request a demo
Smart Service Update 102 adds some great new features to the software, including a batch invoice redesign and customer text messaging in Smart Service and iFleet. To familiarize yourself with these new features, watch our update video:
Text Messaging in Smart Service
The texting features in Smart Service Update 102 will enhance your ability to communicate with customers, keeping them informed of upcoming appointments. To activate text messaging, give our Help Desk a call at 888-518-0818. Once you do this, Smart Service will purchase a phone number local to your headquarters. We will integrate this number with your Smart Service database, allowing you to send and receive text messages via this number in Smart Service and iFleet. (Note that you will only be able to send and receive SMS messages with this feature. MMS messages (such as photos) are not compatible with Smart Service texting.) After activating the text messaging add-on, you can purchase text messages at a rate of about one text per penny. To do this, click the "Purchase Messages" button within the new Text Messaging screen.
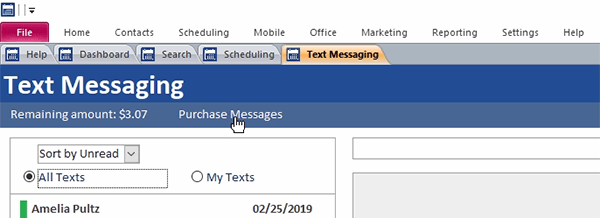
This will take you to a secure online portal where you can buy texts for use inside Smart Service and iFleet. (Note that it may take up to an hour from the moment of purchase for new text messages to become available.) Before you can send a text message via Smart Service, you must actively opt the recipient into the text messaging service.

Once you've done this, the “Copy Data” tool can help you add the customer’s SMS number to the rest of their existing records.
Creating Text Message Templates
You can use Smart Service to create template messages and reminders for customers with upcoming services. To set up these templates, go to Office > Set Up Smart Service Add-ons > Message. Here you can set up a custom automated reminder message for each Job Type your company uses. While creating these messages, you can right click to choose from a number of smart field options. These will automatically insert individualized information (such as customer name or appointment time).
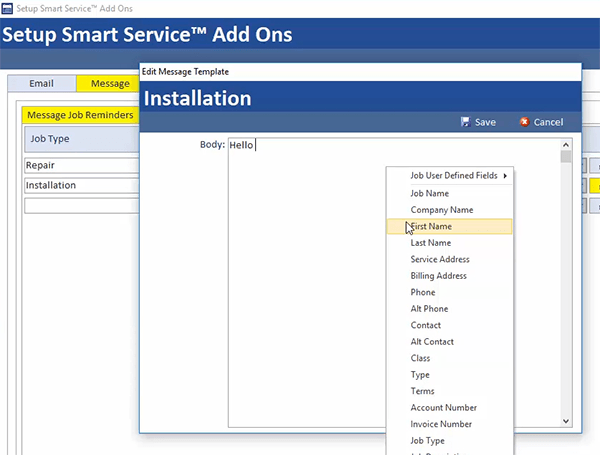
In this same section of Smart Service, the Message Shortcuts tab will allow you to create a series of preset responses. You can use these to streamline future text exchanges within the Text Messaging center. After setting up your text message templates, navigate to the Office screen. Once there, click Message Job Reminders (under the Job Preparation section).
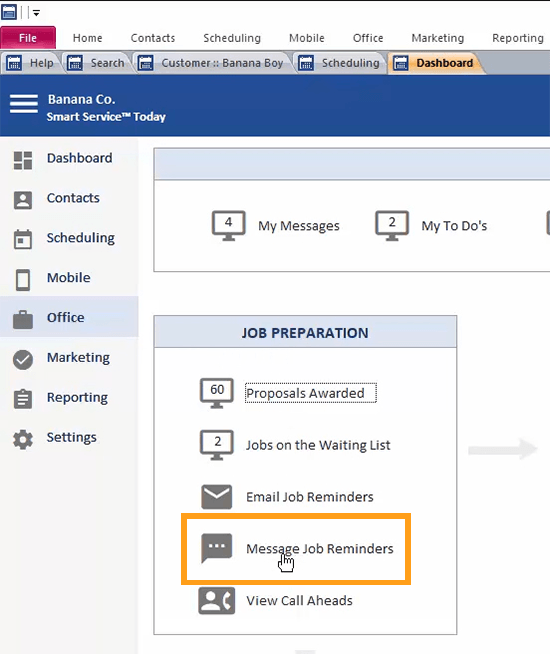
From the resulting screen, you can send a text message reminder (based on your Job Type templates) to all customers with services scheduled within a particular timeframe. (This works in largely the same way as the classic Smart Service Email Job Reminders feature.)
Text Messaging Center
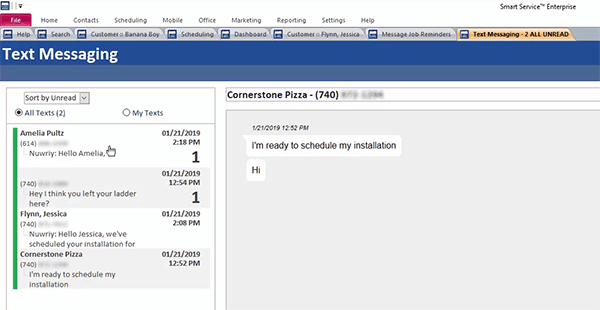
A new hub within Smart Service houses all of your customer text message correspondence. To use it, go to the Office Screen. In the Today For Me section, click My Messages. From here, you can send and receive text messages, as well as read all of your past SMS correspondence with your customers.
Customer Notifications (Texting in iFleet)
As of Update 102, iFleet can send your customers reminder notifications when a tech begins to travel to their location to perform a service. To set this up, in Smart Service go to Settings > iFleet and click the box next to Enable customer notifications. The pencil icon next to this option will allow you to create the text message that customers will receive (again, right click to insert smart fields).
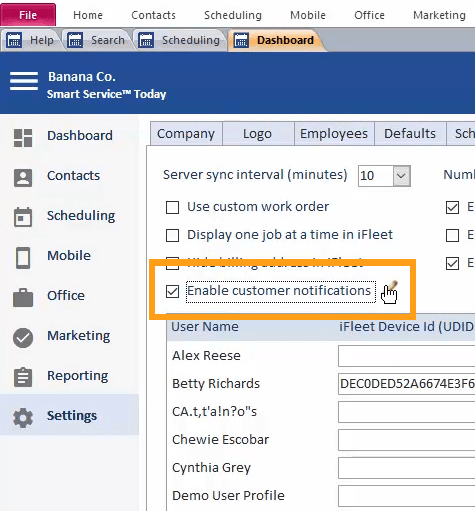
Once you've done this, your customers will receive an automated notification every time a tech taps "Start traveling to job" in iFleet.

Note that this feature replaces the existing iFleet customer notification feature from previous versions of Smart Service.
Batch Invoice Redesign
The Batch Invoices screen has received a complete overhaul to help users view, organize, and post batched jobs. New Job Type and Recurrence Pattern filters will display specific types of services for review and posting. Users will also gain the option to search for the “Last Job Date,” which is the most recent service date completed for a particular batch service. A “Search For” box allows users to locate a specific customer or job. Clicking the underlined record name for each batched job will display a window detailing information connected to each service date within the batch. Finally, users can select and post multiple (or all) batch invoices to QuickBooks at once.
Other Resources
Click to view the complete 10.102.1 release notes. Click to update Smart Service.


